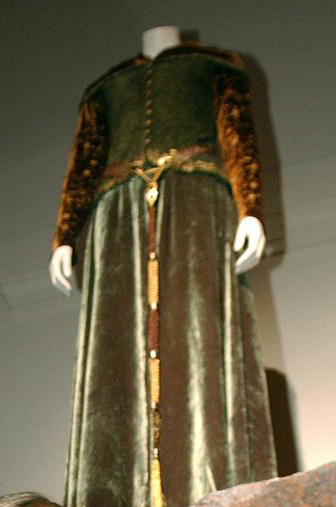
I like this Eowyn's outfit very much - it is very interesting, and I want to make it for my Sydney Chase or Barbie doll, but now I have to finish cca other 15 various doll costumes....
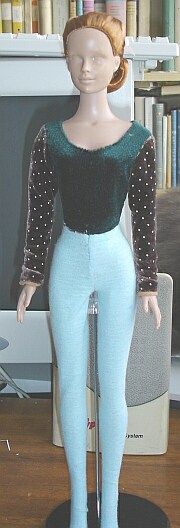
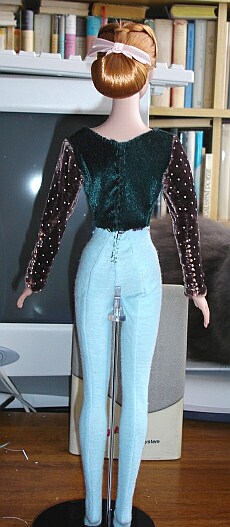
Here is a few tips, images and pattern for brave hearts and skilful hands - I don't claim, that pattern is perfect - no! It is only a basis for me (in future) and you, if you decide to use it. The muslin looks awful (I made it from various duvetyne and velvet bits), but the shape seems right - pictures
coming soon, I suppose.
Doll's outfit consists from 2 layers plus the collar. It is designed for Tyler Wentworth body size and shape (including Sydney Chase, Brenda Starr and other 16" Tonner dolls). The pattern is WITHOUT seam allowances.
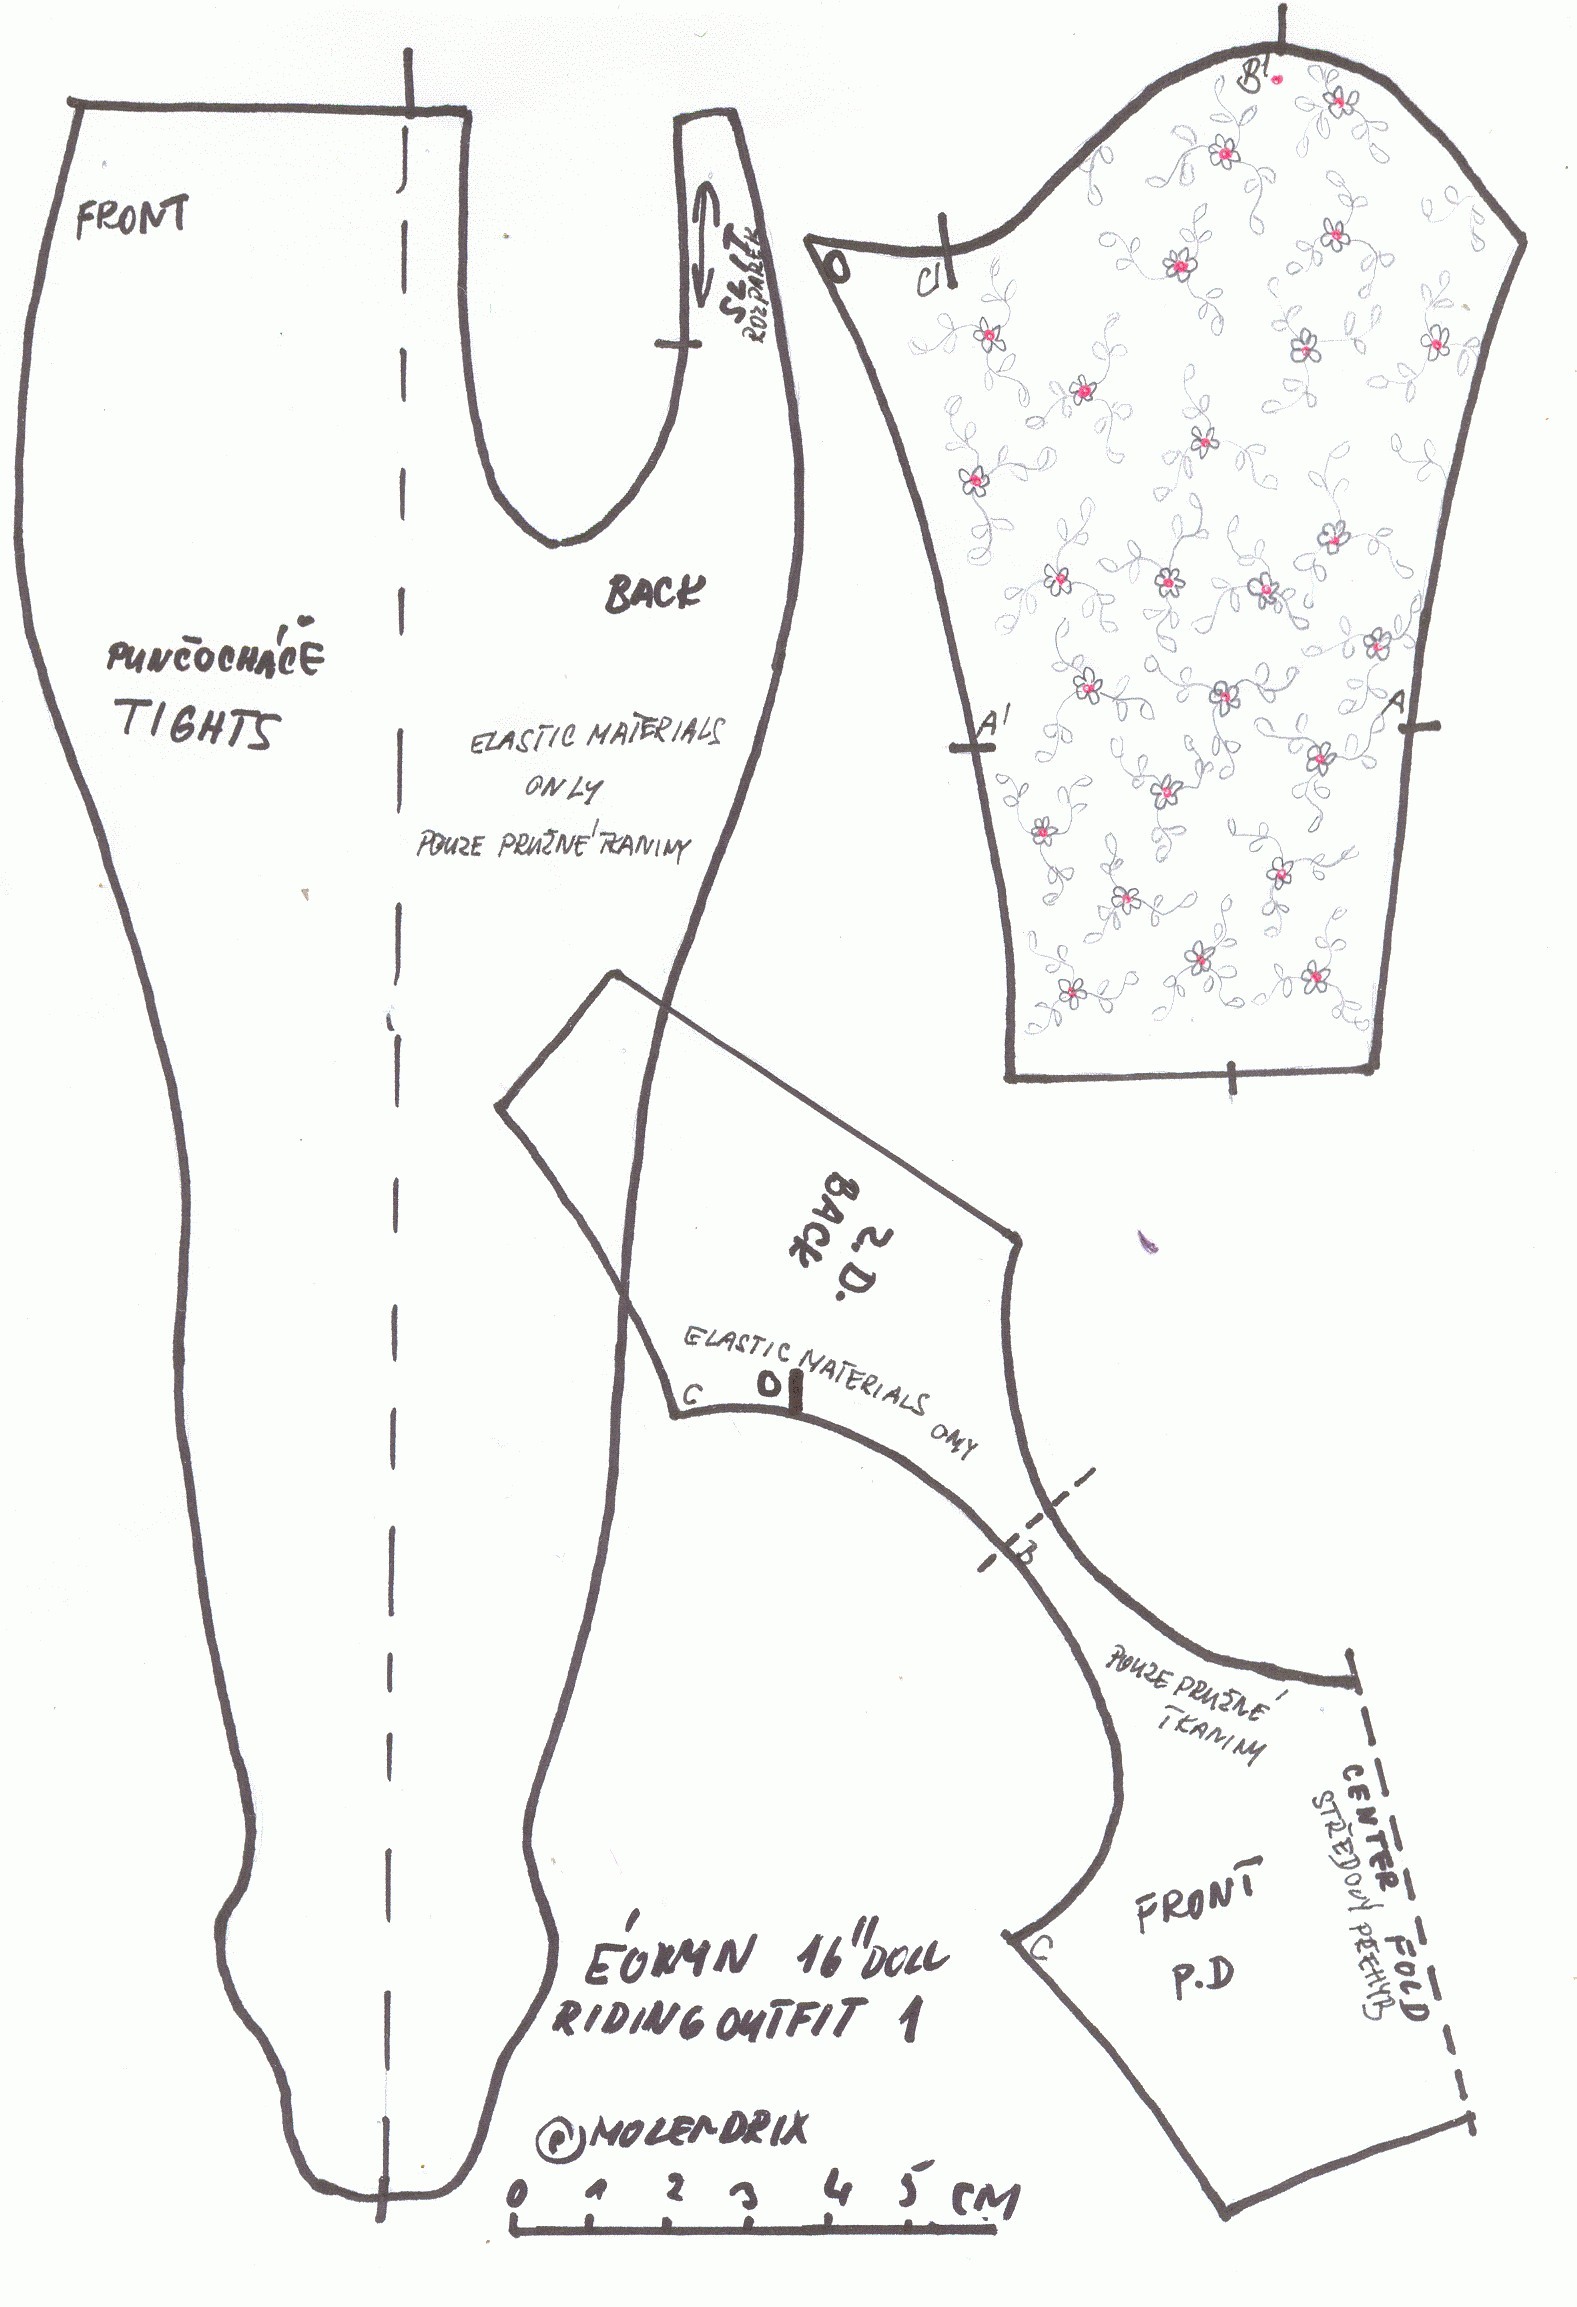
1. Underlayer : brown tights, top with low neck and ornate velvet sleeves, all sewn together, fastens at back.
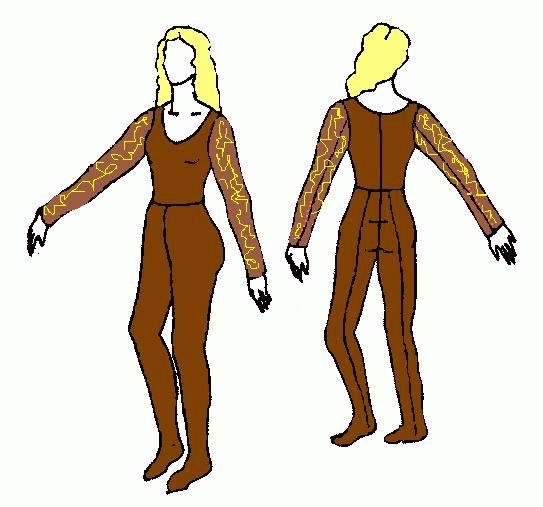
Pattern for tights and top is designed for elastic materials, for muslin I used old cotton T-shirt.
Please, use your old brown T shirt, or buy cheap new one, but don't dye it brown yourself! It can leave dark stains on your doll (my own negative experience...)
A) TIGHTS
1.Sew together sides of each leg. Sew together both legs, from front to the mark. Try on doll, when it fits good, cut out unnecesary material (3-4 mm as seam allowance is enough) and secure edges from fraying with buttonhole stitch or FrayCheck.
B.)TOP
There are no shoulder seams. Sew together side seams, attach to the tights. Line the neck with a fine bias stripe.
C) SLEEVES
it depends - if you have velvet patterned or painted, there is not necessary to line it. Simply sew the seam from top to the mark A, hem the bottom and secure the edges from fraying with buttonhole stitch or FrayCheck.
Then turn the sleeve to the right side, attach to the top - the mark C (sleeve) to the mark C (top), O to O etc...
If you have embroidered velvet, doll's fingers could damage it. Here is better to bag-line the sleeve with some fine, non too elastic material - bias cut finer habotai perhaps. Turn it to the right side, iron it, sew the sides of sleeve together (use fine, almost invisible lacing-like stitch) from top to the mark A, then attach the sleeve to the top - the mark C (sleeve) to the mark C (top), O to O etc...
Then take fine rubber brown thread and sew together rest of sleeve seam - from the elbow to the wrist. Sew on row of golden beads (9-12) as buttons. Make back fastening (hooks and eyes, snaps...)
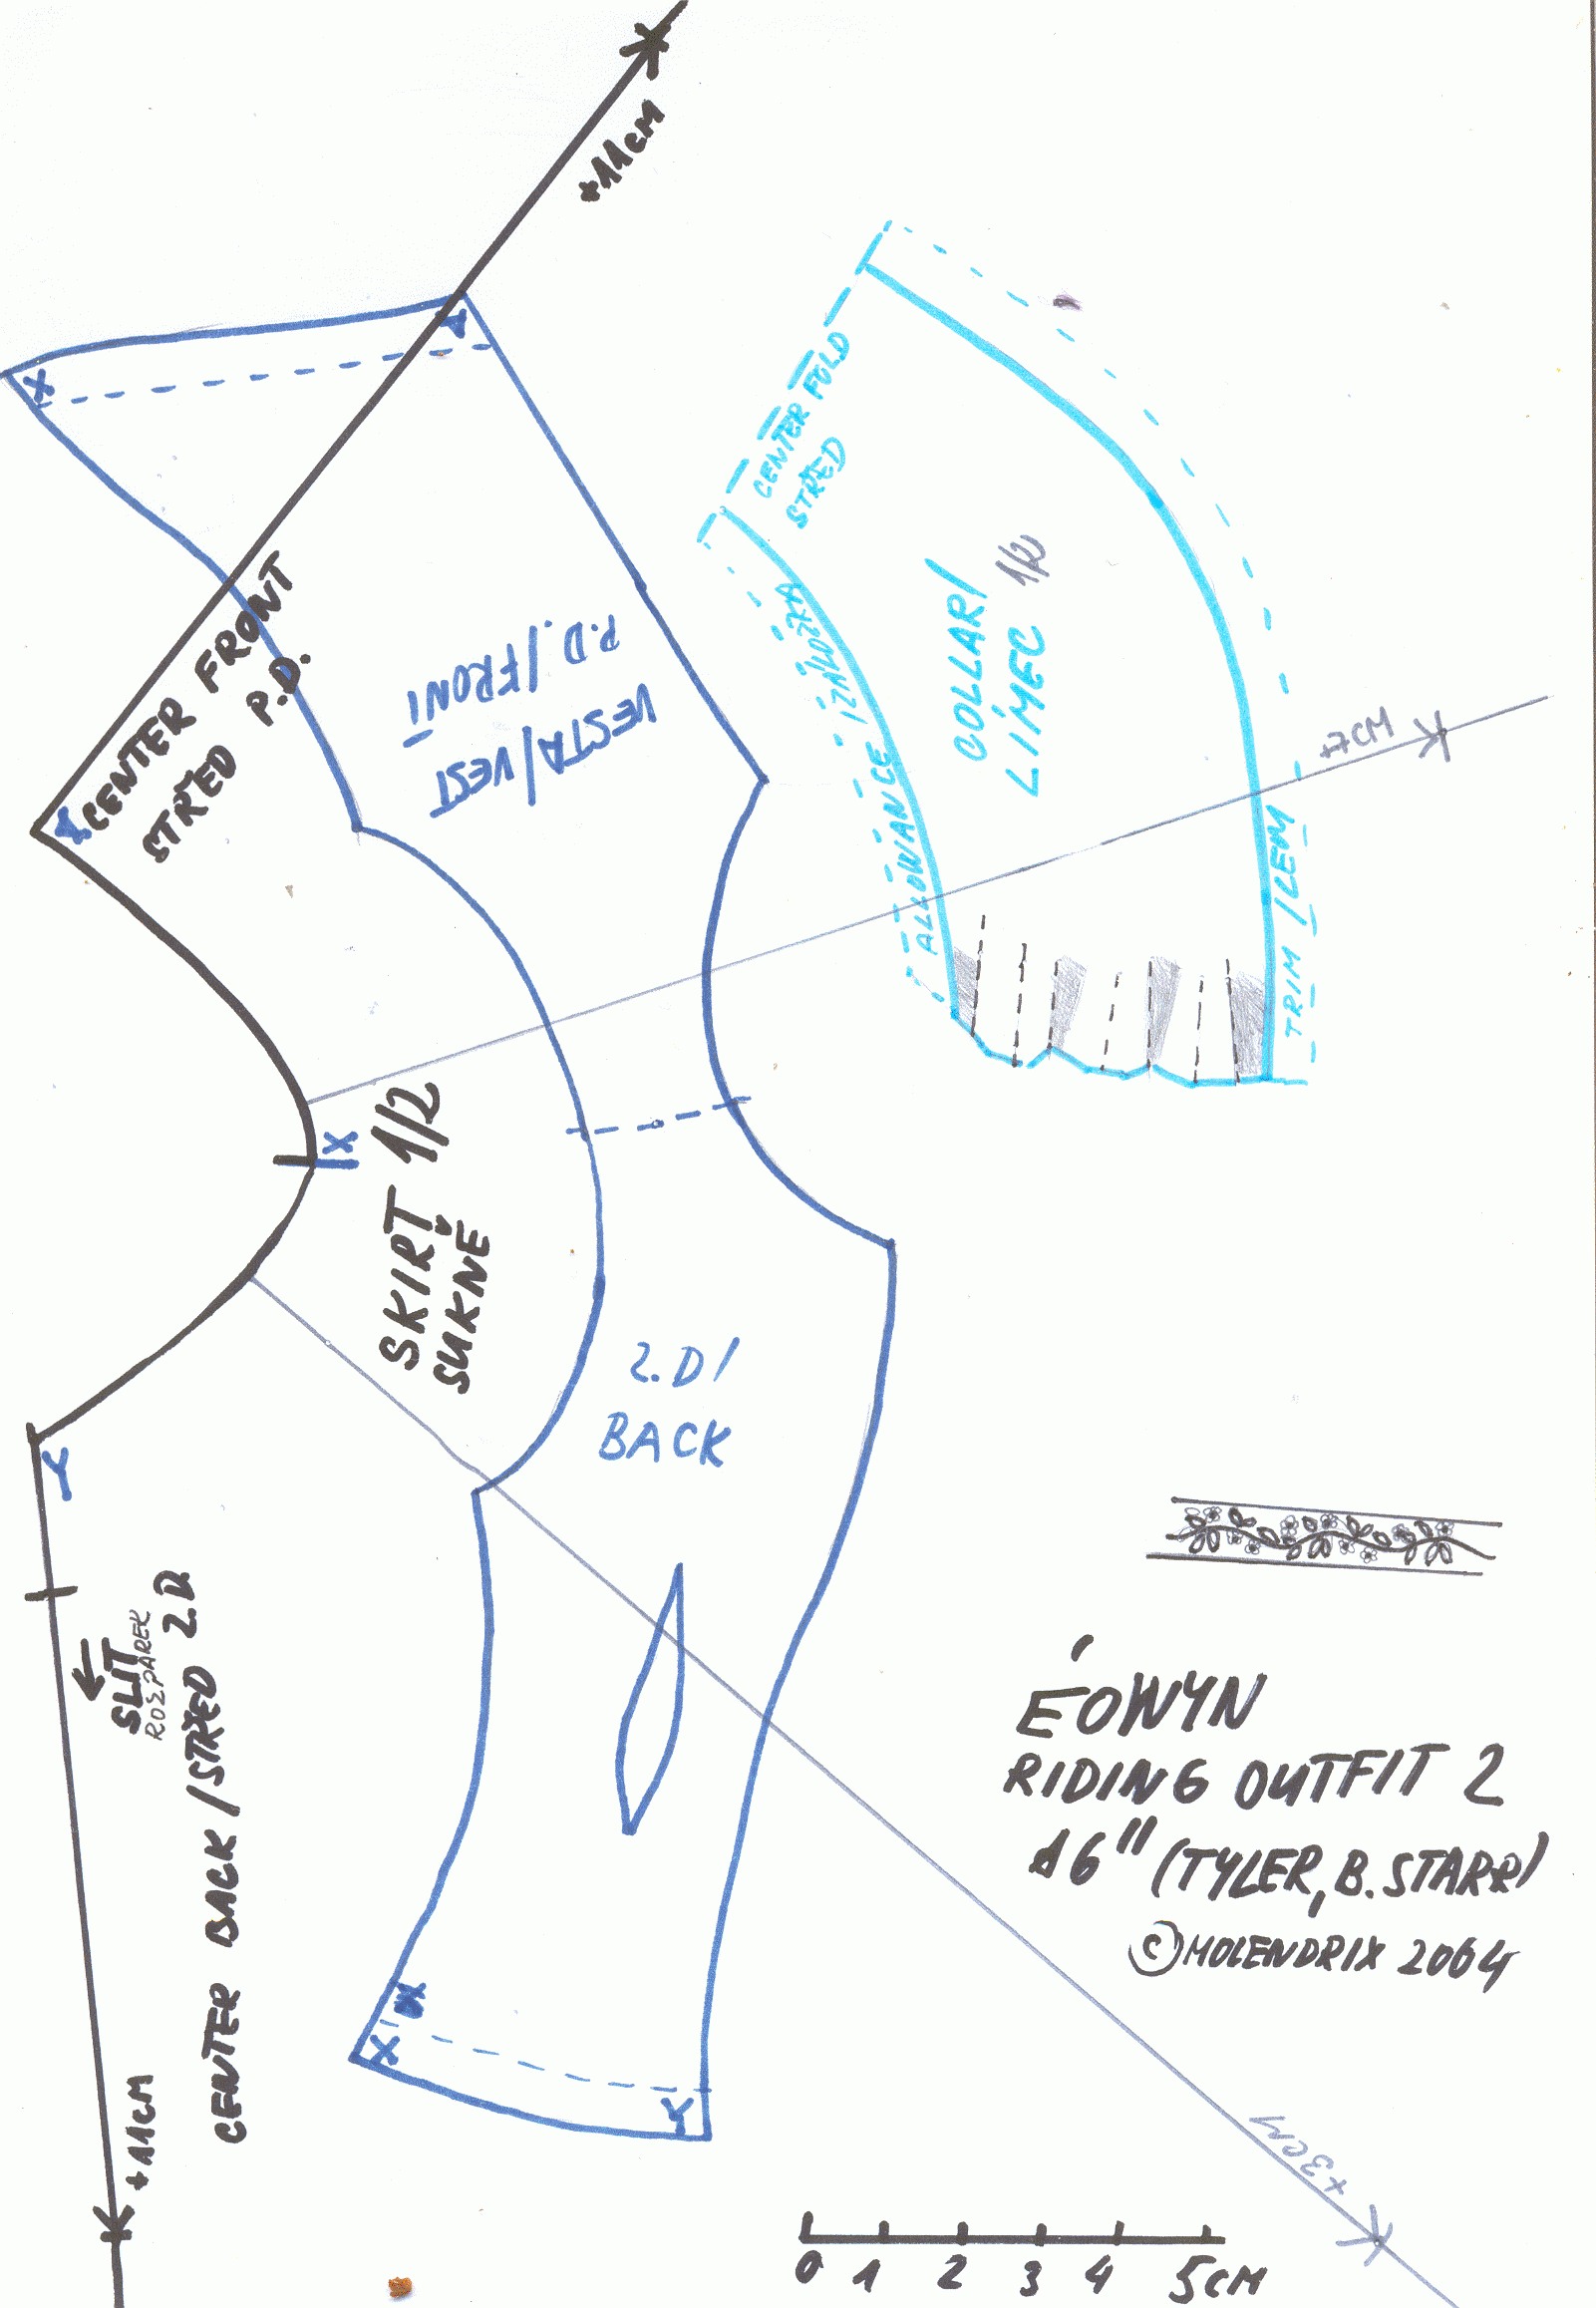
2. Quilted WAISTCOAT and SKIRT, sewn together, fastens at front.
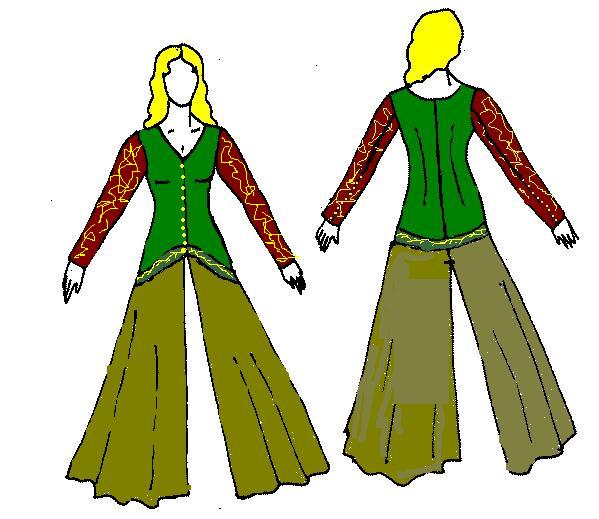
The waistcoat should be made from material, which is at least a bit elastic - for example synthetic duvetyne or silk velvet. Skirt may be bag-lined or not, with back slit or without it. It depends on you. I wasn't able to scan whole skirt pattern - it is too large - so I draw the top of the skirt only. Transfer this piece to some large piece of paper (newspaper, for example) and elongate the lines from marks to needed length. Connect the acquired points and round the edge of the skirt pattern.
Sew bodice's back darts, back center seam and side seams.
Skirt consist of 2 pieces - sew back central seam from top to the mark (whole length of the seam is cca 2 cm.) Or sew it to the hem, as you want. Attach the right side to the right side of the waistcoat (mark Y to Y etc...), turn the seam allowance to the waistcoat part and line the whole waistcoat. Attach trim, fastening (probably best would be tiny hooks and eyes). Quilt the waistcoat, sew on the "buttons".
3. Pleated COLLAR, fastens at front, is attached to the waistcoat with only a few stitches at front.
 Well, the worst part of the whole thing. It should be made from fine velvet. There are 3 pleats on each side. Please, make your own muslin for this part first... On the pattern, there are darkened parts - this parts will be VISIBLE. The white parts of the pleating will be HIDDEN. After pleating sew on the one side of collar small piece of material as base for snap or velcro. Line the "neckline" with narrow bias stripe of brown ponge or so. Sew on the trim and attach both ends of the collar to the front sides of the waistcoat.

pattern 1
tights, top and sleeve
|
pattern 2
waistcoat, skirt and collar |
|
I hope it helps. I would be happy to see your creations!

©molendrix 2004
|